
Seamlessly integrate WhatsApp Cloud API with bitbybit to streamline your customer communications.
If the number is already in use on WhatsApp (regular, business, or mobile), you need to delete the existing account before registering it for the API. For assistance, talk to Sales. Follow this step-by-step guide for a smooth setup process.
We highly recommend using a new phone number for registration ensures a hassle-free setup.
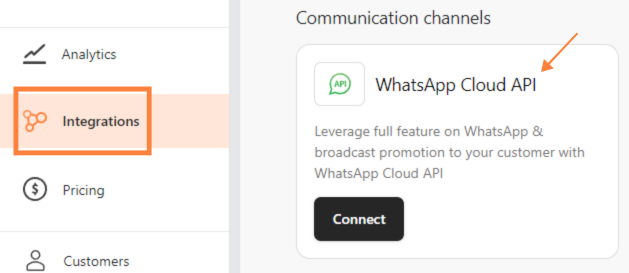
Step 1: Access Integrations
1. Navigate to the "Integrations" dashboard. Select “WhatsApp Cloud API”.
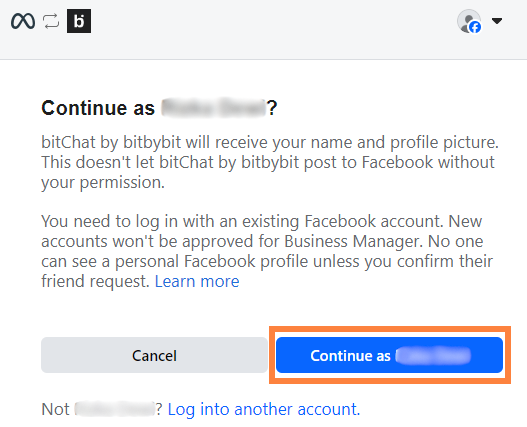
Step 2: Set Up Your Meta Account
1. Click “Connect to Meta”.

1. Select "Continue as your Facebook Account".
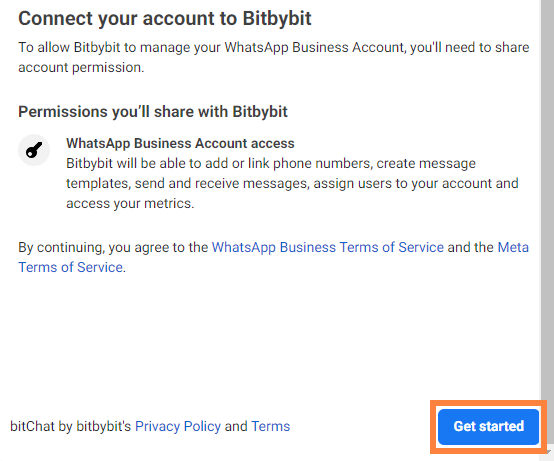
2. Click "Get started".
3. On the "Fill in your business information", click the "Business portfolio" dropdown and choose between:
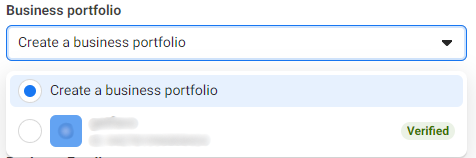
- Create a business portfolio and fill in details like "Business name," "Business email," "Business website or profile page," and "Country".
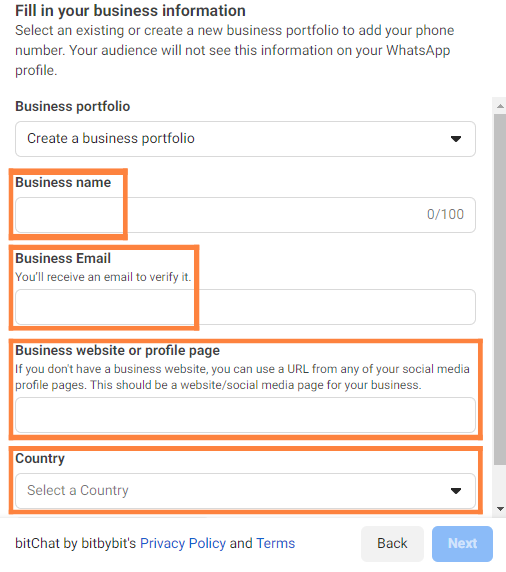
- Or select an existing business portfolio from the dropdown, which will auto-fill the form.
- Click "Next".
4. On the "Create or select your WhatsApp Business Account", click the "Create a WhatsApp Business Account" and “Create or Choose WhatsApp Business Profile” dropdown and choose between:
- Choose "Create a WhatsApp Business Account" and in the next dropdown, "Create a new WhatsApp Business Profile."
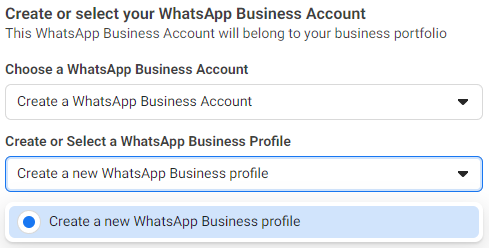
- Fill in "WhatsApp Business Account Name," "WhatsApp Business display name," and "Category". Then click “Next”.

- Or select an existing “WhatsApp Business account” and, in the "Create or choose WhatsApp Business Profile" dropdown, choose to "Create a new WhatsApp Business profile."

#Importance You can create multiple profiles on your WhatsApp Business account.
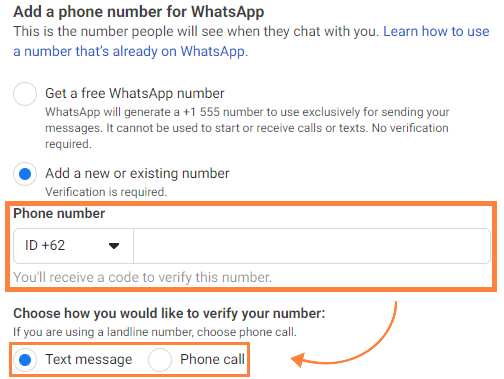
5. Enter a phone number to receive the verification code in "Add a new or existing number."

Step 3: Add Payment Method
1. Complete the process by clicking "Add payment method"

Please pay attention: To unlock additional features and other advanced functionalities, you need to add a payment method.
- If you skip adding a payment method, your WhatsApp Cloud API will still be connected, but some features will be restricted.
Note: We highly recommend enabling two-factor authentication for enhanced security.
Step 4: Test Your WhatsApp API Connection
After setting up WhatsApp Cloud API, test it by sending a message using a Campaign, Automation, or Chat Initiation template. Follow these guides to create your template:
- Campaign: Create Template Campaign
- Automation: Create Template Automation
- Chat Initiation: Create Template Chat Initiation
Note that Meta categorizes messages into conversation rate: Authentication, Marketing, Utility, Service. Check Meta’s pricing details here.
Once your template is created, test it in bitbybit’s LiveChat page to ensure it sends and receives successfully.
The message you sent should appear on the bitbybit Livechat page.

Congratulations! You have successfully created and connected your WhatsApp Cloud API with bitbybit. This powerful integration will help you manage your customer communications more efficiently, providing a seamless and professional experience for your clients.
Happy messaging!