Enhance your customer experience by setting up a Welcome Message in bitChat. This message automatically greets new contacts when they reach out, creating a positive first impression and improving engagement. Follow these steps to activate it quickly and efficiently.
Step 1: Create a Chatbot
- Before you can set up a Welcome Message, you need to create a chatbot flow. Follow the steps in How to Create A Chatbot Flow to get started.
Step 2: Assign the Welcome Action
- Once your chatbot has been created, go to the bitChat Chatbot dashboard.
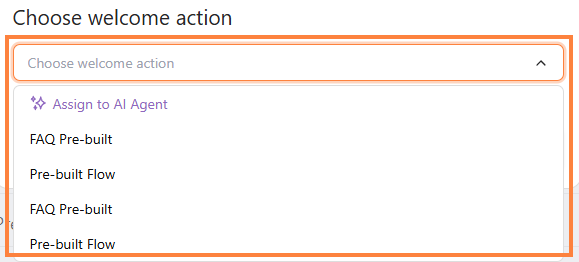
- Click on the Welcome action card.

- In the dropdown, select the chatbot flow that you have created for your store's welcome message.

Step 3: Save

#Note: The Welcome Message will be triggered when new contacts reach out for the first time and every 12 hours thereafter.
