
Manage customer expectations by setting up an Away Message in bitChat, automatically informing contacts when you’re unavailable. This feature is crucial for maintaining good communication outside of business hours. Here’s how to configure it for seamless support.
Step 1: Create a Chatbot
- Before you can set up an Away Message, you need to create a chatbot flow. Follow the steps in How to Create A Chatbot Flow to get started.
Step 2: Configure the Away Action
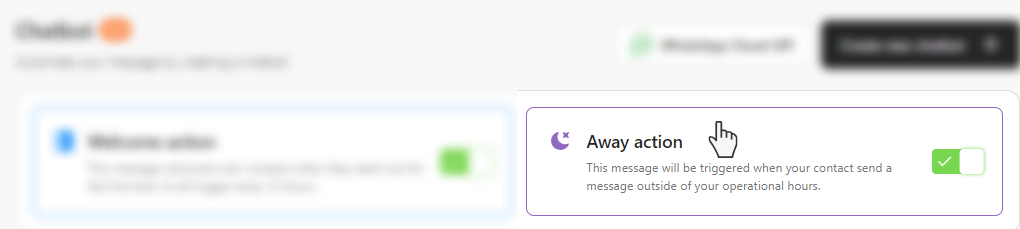
- Once your chatbot has been created, go to the bitChat Chatbot dashboard.
- Click on the Away action card.
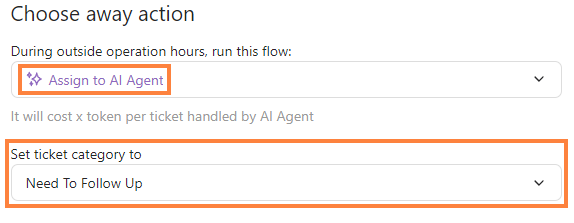
Step 3: Assign Flow
- Click the dropdown, and select the flow for away action. You can choose between a chatbot flow or "Assign to AI Agent”. To activate AI Agent to suits your brand's persona, see How to Create and Set Up Your AI Agent Persona.
- “Set ticket category”, see How to Create a Ticket Category.
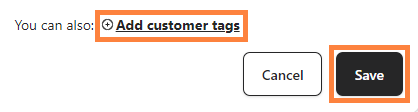
Step 4: Add Customer Tags and Save
- Optionally, you can also “Add customer tags” to categorize contacts. Then, click “Save”.
Note: The Away Message will be triggered when your contacts send messages outside your operational hours.