Creating customer segments in bitbybit allows you to target specific groups with tailored messaging and offers. Follow these steps to create a customer segment:
Step-by-Step Guide
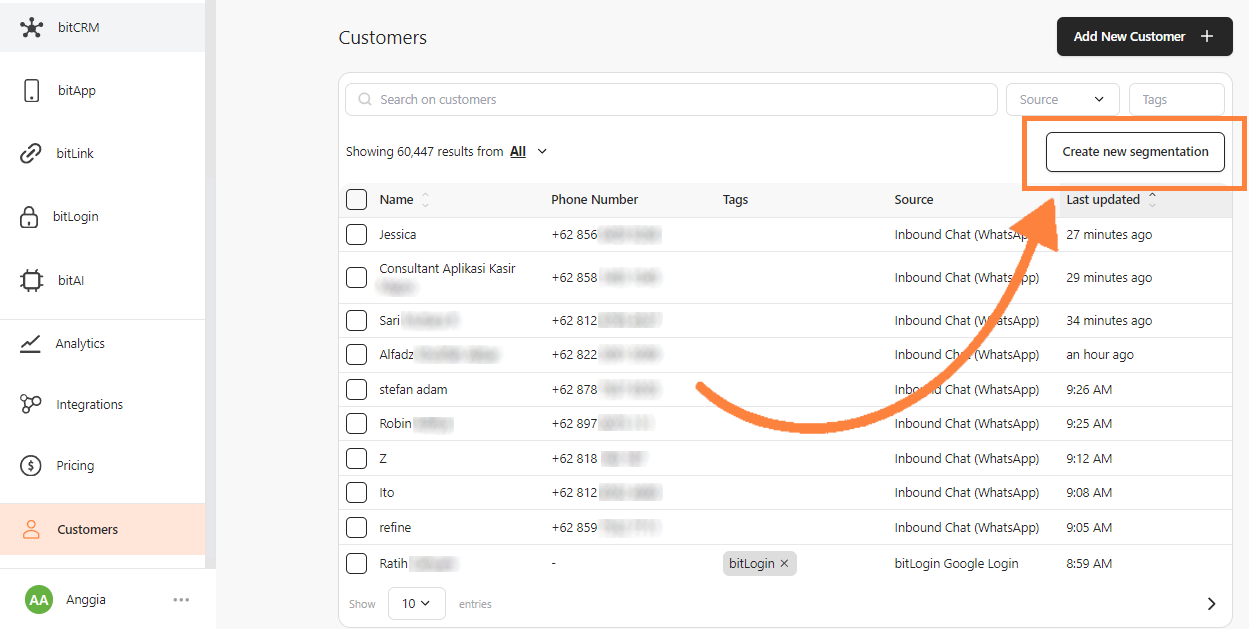
- Access the Customers Dashboard: Navigate to the Customers dashboard and click the “Create new segmentation” button. You will be redirected to the ‘Create segmentation’ page.
- Create the Segmentation Name: Fill in the segment name in the provided field.

- Set the Conditions: In the ‘Condition’ section, choose the customers’ conditions you wish to include in your segmentation.
- On the first dropdown menu, select either ‘Have’ or ‘Not have’.

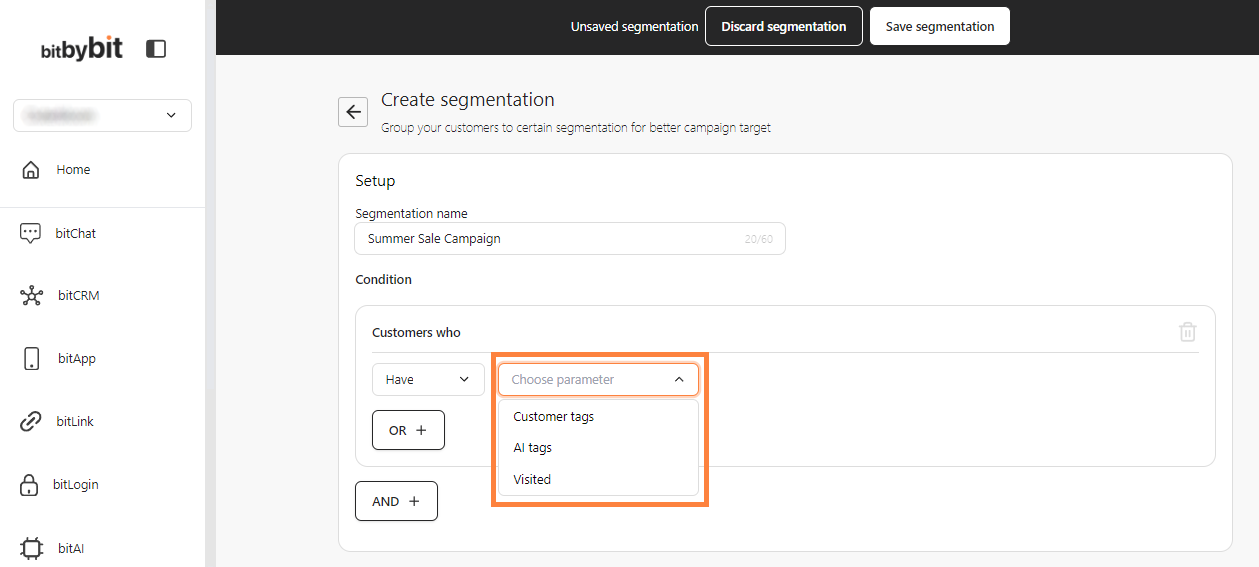
- In the second dropdown menu, choose the parameter you wish to filter your segmentation by. Select one from the options.
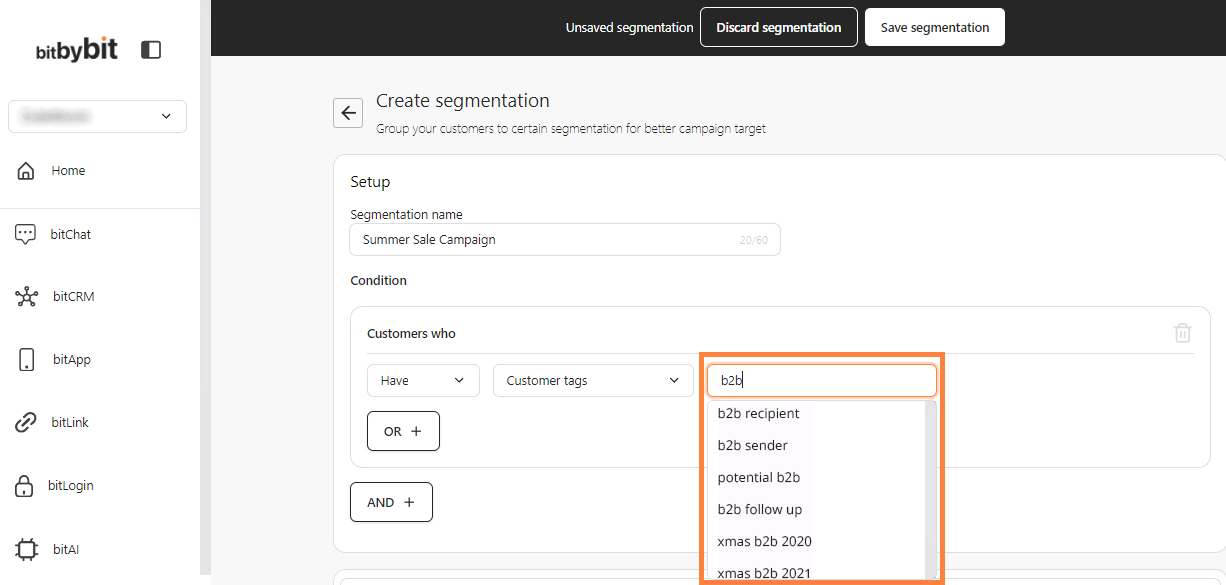
- In the next dropdown filter, scroll down to find the tag or type in the field to search. Click to select.
- Add Additional Filters: You can add another filter by clicking the “OR +” or “AND +” button. You can add multiple filters in this section.
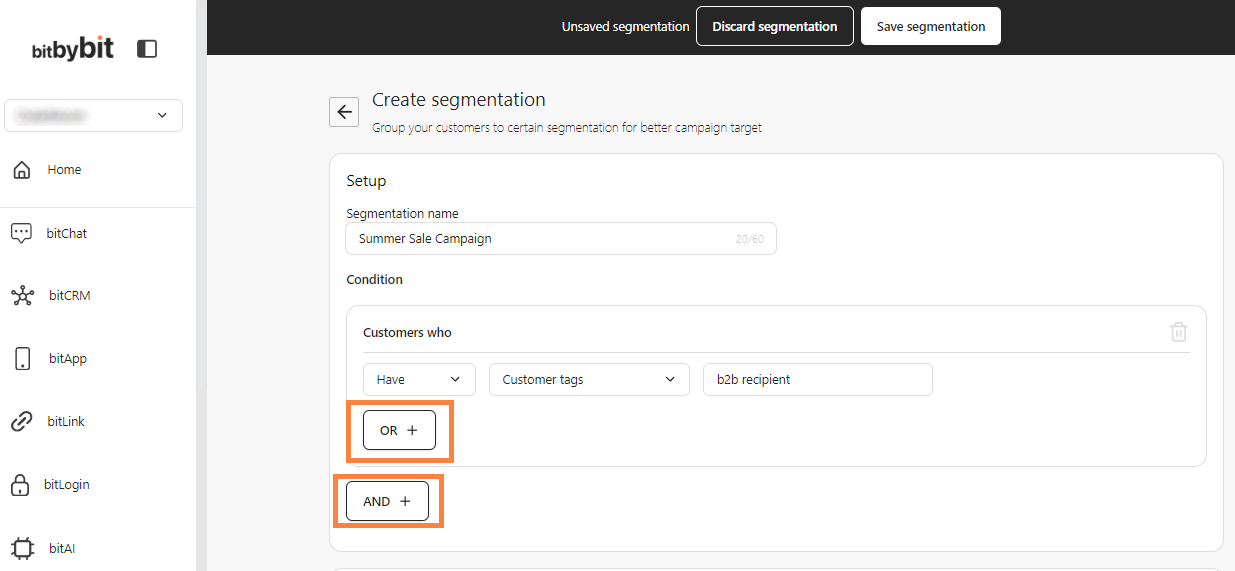
- OR: Add an “or” filter to identify customers that meet at least one criterion within a set of filters.
For example, to identify customers that have “B2B sender” tags OR have “B2B recipient” tags, click “OR +” before adding the second filter.
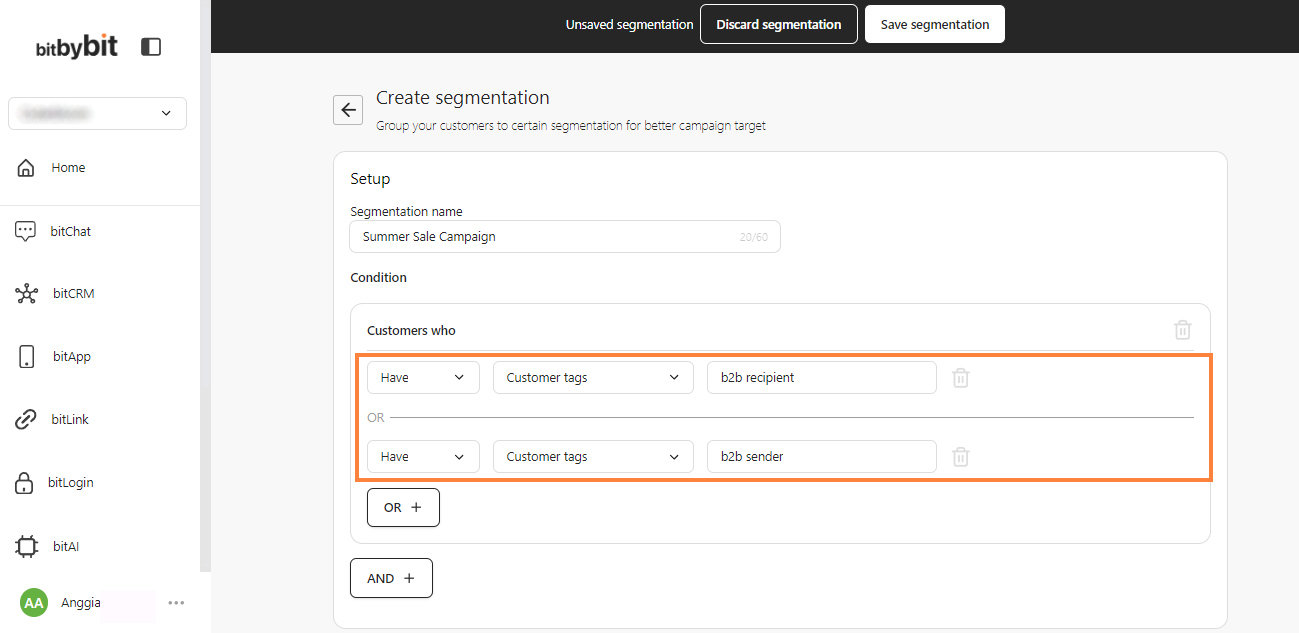
- AND: Add an “and” filter to identify customers that meet all criteria within a set of filters.
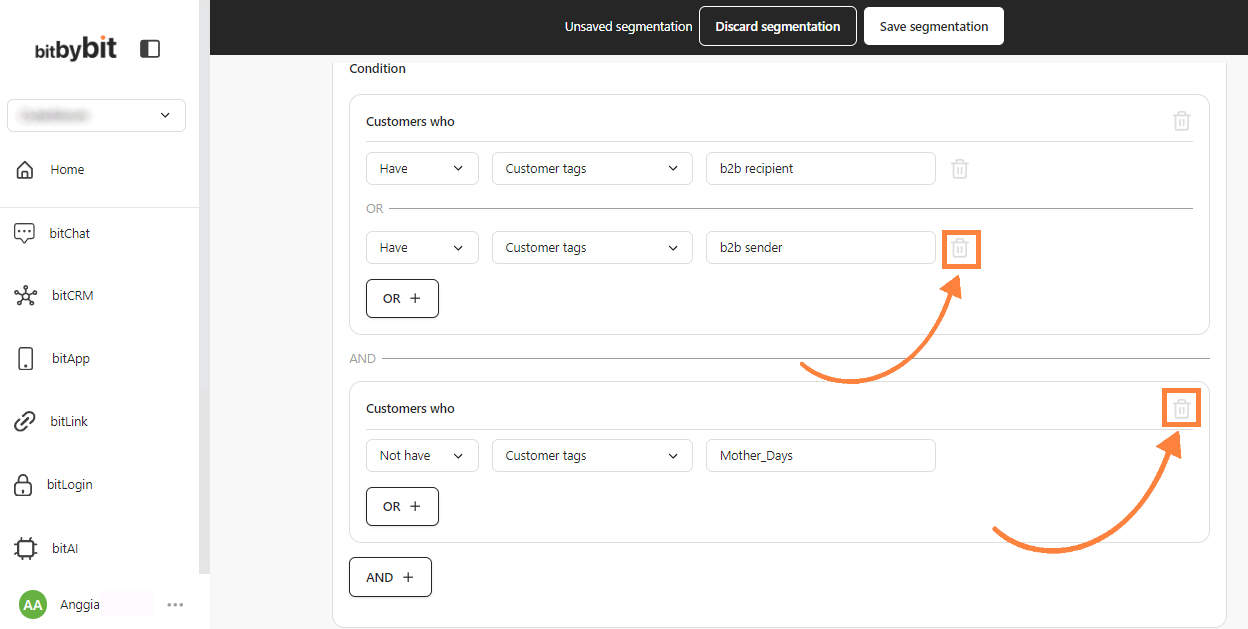
For example, To identify customers that have “B2B recipient” tags AND do not have “Mother_Days” tags, click “AND +” before adding the second filter.

- Delete Unwanted Filters: To delete a filter, simply click the Trash icon on the right side of each filter.
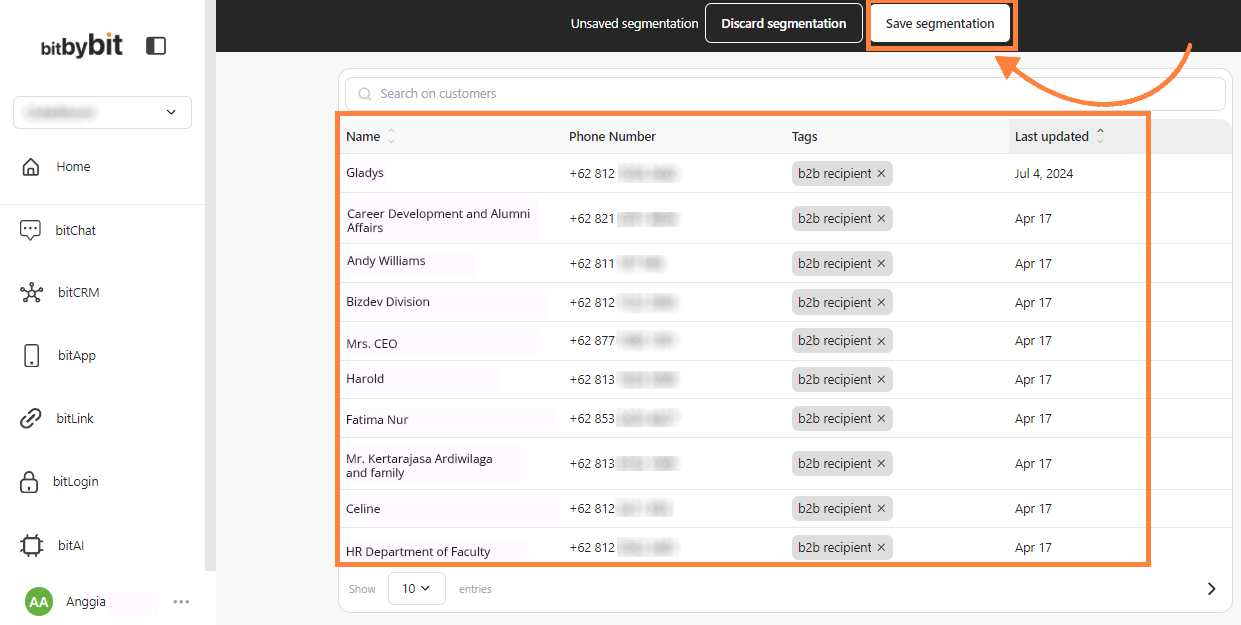
- Review and Save: Scroll down to see your customer segmentation filter results and then click “Save segmentation” at the top of the page.
By creating customer segments in bitbybit, you can enhance your marketing efforts by targeting specific groups with personalized messaging, ultimately improving customer engagement and satisfaction.
