
Creating a chatbot flow in bitChat allows you to automate customer interactions across various channels, providing a seamless experience. Follow these steps to create a chatbot flow:
Step-by-Step Guide
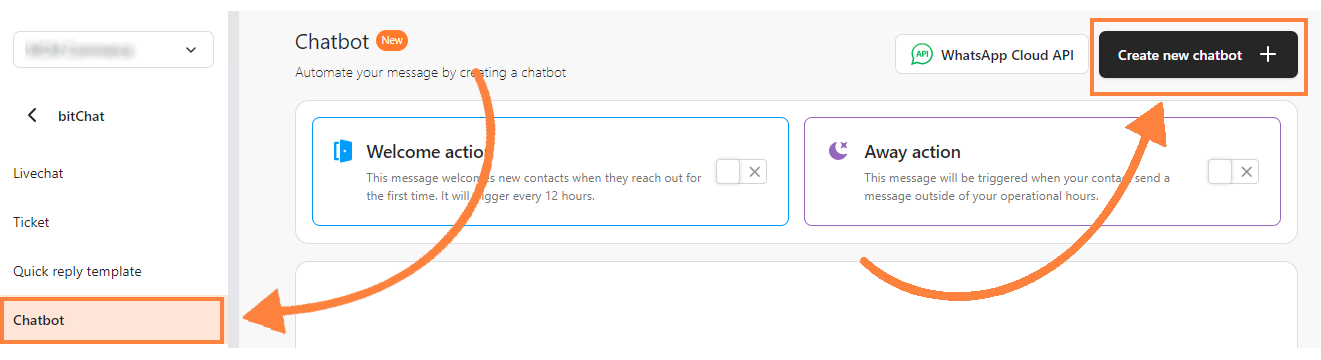
Step 1: Access the Chatbot Dashboard
- Go to the bitChat dashboard and click “Chatbot”.
- On the top-right of the page, click the “Create new chatbot +” button.
Step 2: Choose the Chatbot Channel
Select the channel you wish to create a chatbot for. You can choose between WhatsApp Business App, WhatsApp Cloud API, and Instagram.

For WhatsApp Business App and Instagram:
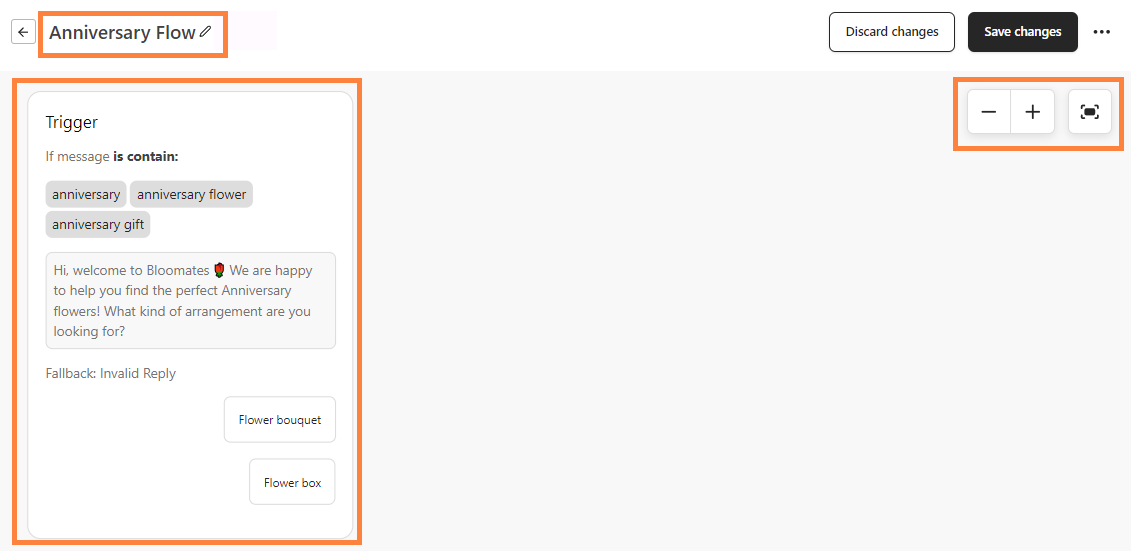
1. Fill in the Trigger Window:
- Fallback Message: Choose the fallback message for this trigger. You can set up fallback messages in the Chatbot settings.

- Keyword Condition (If message): Select “is contain” if you want the trigger message to contain the keyword or “is exact” if you want the trigger message to be exactly the keyword.

- Input Keyword: Enter the keywords for the trigger. Press Enter to add multiple keywords.

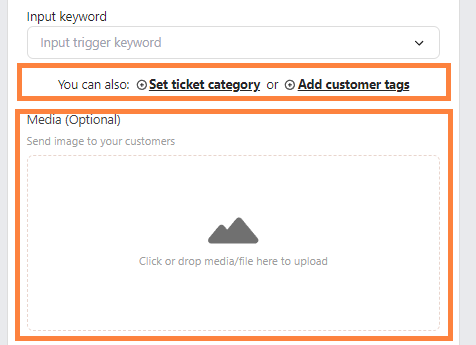
- Optional Settings:
- Set a ticket category and customer tag to automatically categorize and tag customers who send the trigger message.
- Drag and drop an image into the media box.
- Message: Fill in the field with the message.

- Reply Options: Input the reply options.

- Click “Save”.
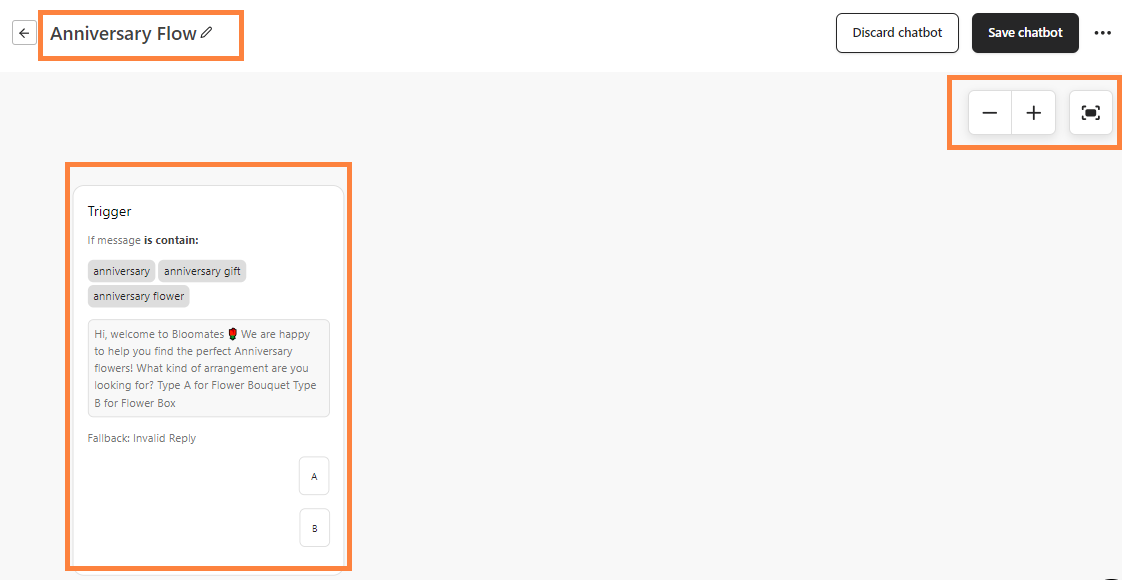
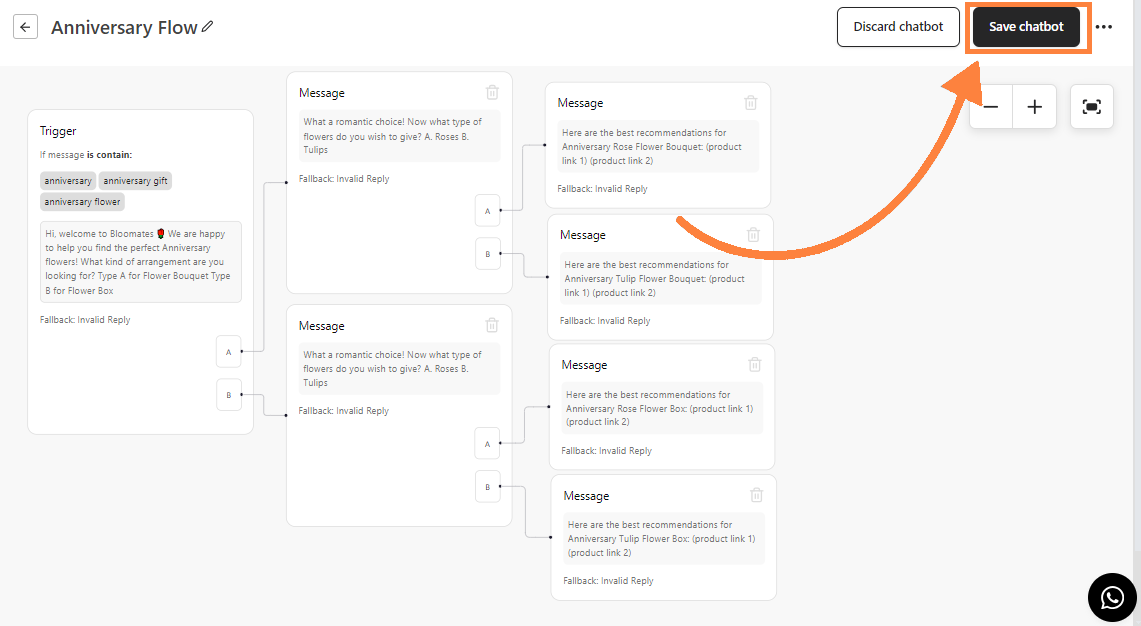
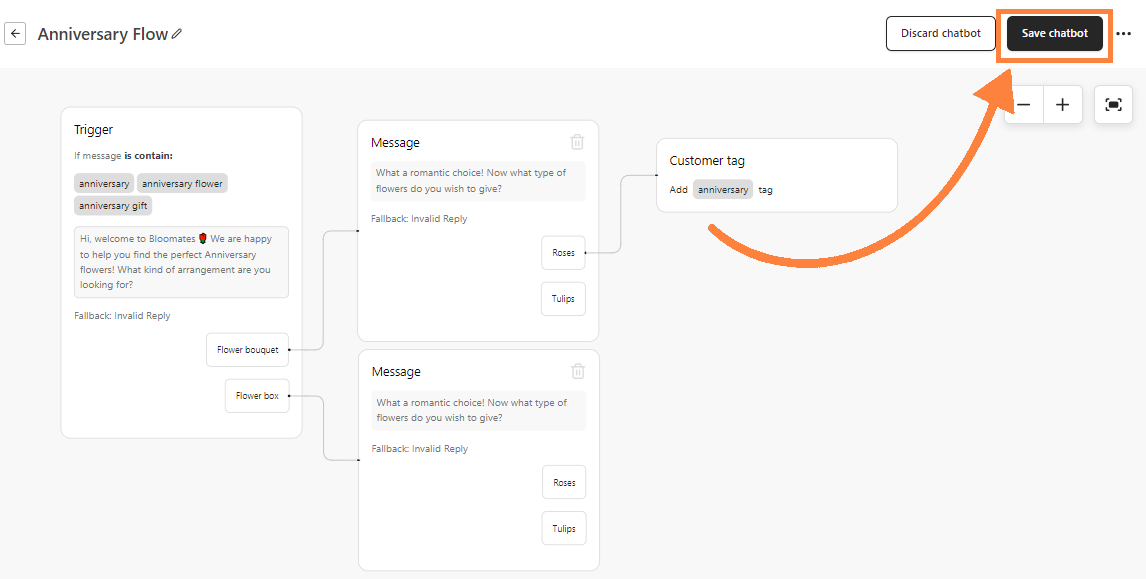
2. Edit and Navigate the Chatbot Flow:
- The trigger card will appear on the Chatbot Flow board.
- Edit the flow name in the top right corner.
- Use the “+” and “-” icons on the top left corner to navigate, or use the drag gesture with your cursor.
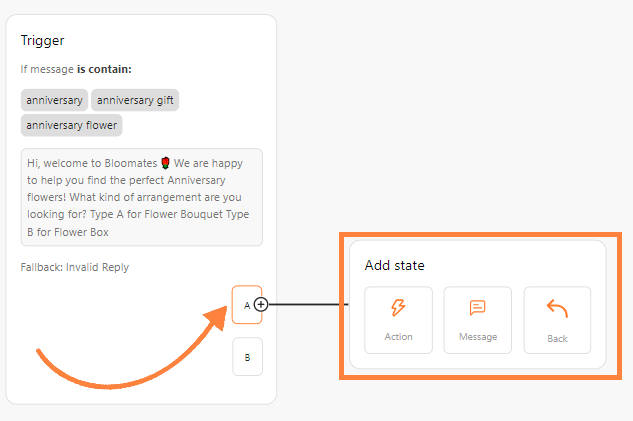
3. Create the Next Flow:
- Click one of the reply options and choose between:
- Action: Triggers an action (e.g., adding a customer tag).
- Message: Opens a new message window to add more reply options.
- Back: Triggers the previous message, allowing the customer to restart the conversation.
4. Save the Chatbot Flow:
- Click the “Save” button.
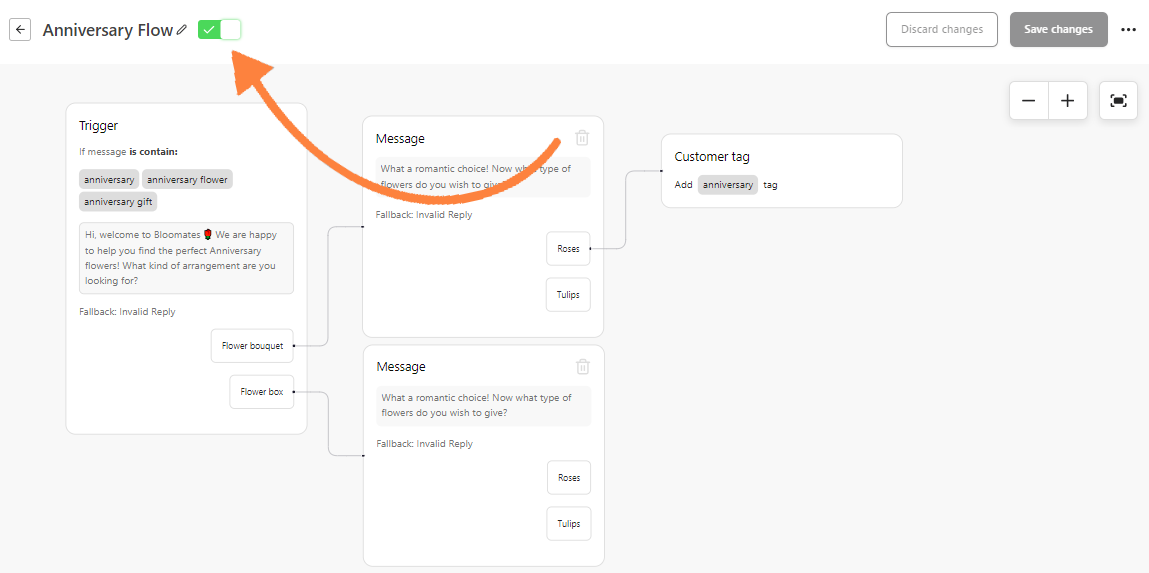
5. Activate the Chatbot Flow:
- Once saved, a toggle will appear beside the title. Click this toggle to activate the chatbot flow.
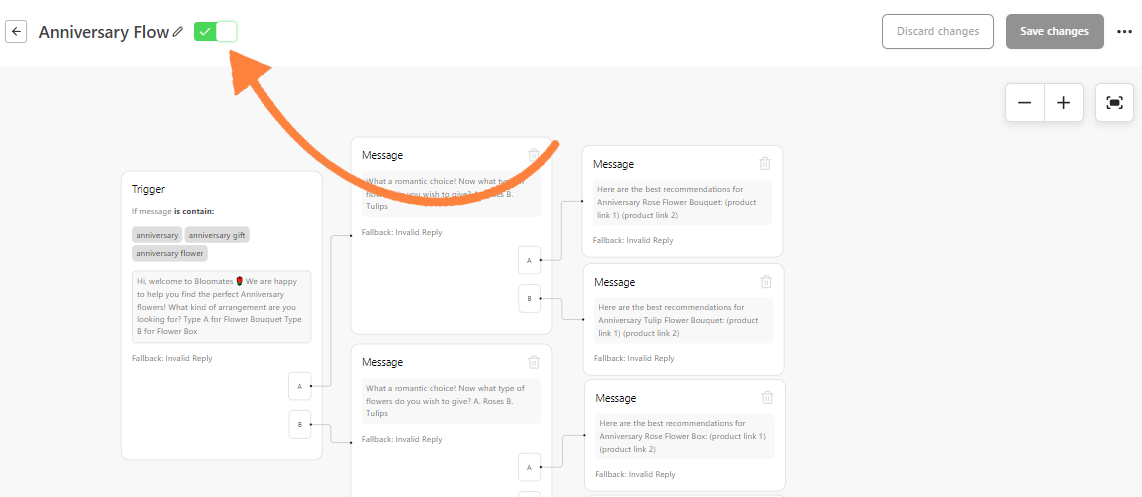
5. Your chatbot flow is now active!
For WhatsApp Cloud API:
1. Fill in the Trigger Window:
- Fallback Message: Choose the fallback message for this trigger. You can set up fallback messages in the Chatbot settings.
- Keyword Condition (If message): Select “is contain” if you want the trigger message to contain the keyword or “is exact” if you want the trigger message to be exactly the keyword.
- Input Keyword: Enter the keywords for the trigger. Press Enter to add multiple keywords.
- Optional Settings:
- Set a ticket category and customer tag to automatically categorize and tag customers who send the trigger message.
- Drag and drop an image into the media box.
- Message: Fill in the field with the message.

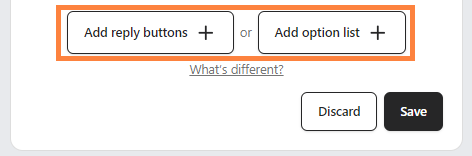
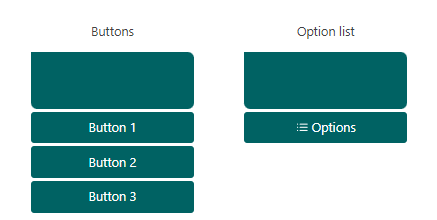
- Reply Options: Choose between:
- Buttons: Add up to 3 buttons. Customers can select each button once.
- Options List: Add more than 3 reply options for greater flexibility.
- Click “Save”.
2. Edit and Navigate the Chatbot Flow:
- The trigger card will appear on the Chatbot Flow board.
- Edit the flow name in the top right corner.
- Use the “+” and “-” icons on the top left corner to navigate, or use the drag gesture with your cursor.
3. Create the Next Flow:
- Click one of the reply options and choose:
- Action: Triggers an action (e.g., adding a customer tag).
- Message: Opens a new message window to add more reply options.

4. Save the Chatbot Flow:
- Click the “Save” button.
5. Activate the Chatbot Flow:
- Once saved, a toggle will appear beside the title. Click this toggle to activate the chatbot flow.
6. Your chatbot flow is now active!
By following these steps, you can efficiently create and manage chatbot flows in bitChat, enhancing customer interaction and providing seamless support across multiple channels.