bitCRM’s automation feature allows you to enhance customer workflows by adding steps such as communication channels, product reviews, or delays. This flexibility ensures your automations are tailored to customer behaviors, increasing engagement and efficiency. Learn how to customize your automation process in a few simple steps.
Step 1: Access the bitCRM Automation Dashboard
- Go to the bitCRM Automation dashboard.
Step 2: Create a New Scenario
- Click "Create new scenario"

Step 3: Set Up Your Trigger Before Adding Steps
- Make sure your trigger is set up correctly before proceeding. For detailed instructions, refer to How to Set up a Trigger.
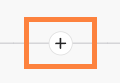
Step 4: Add a Step
- Click "+" to add a step, then select from "Communication channel," "Product Review," "Time delay," or "Conditions" to tailor your automation.

Step 5: Save the Scenario
- Click "Save" and click “Save automation”.