Pricing
Login
Start Free

How to Add an Image Section

bitLink

Adding an image section to your bitLink page is a quick way to elevate its visual appeal and strengthen your brand message. This feature allows for flexible image placement and makes your content more engaging. Follow these steps to integrate images seamlessly.

Step 1: Log in to your bitLink dashboard

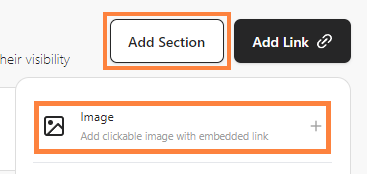
Step 2: Click "Add Section" and select "Image"

Click "Add Section" and select "Image"

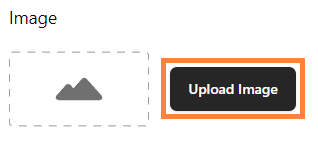
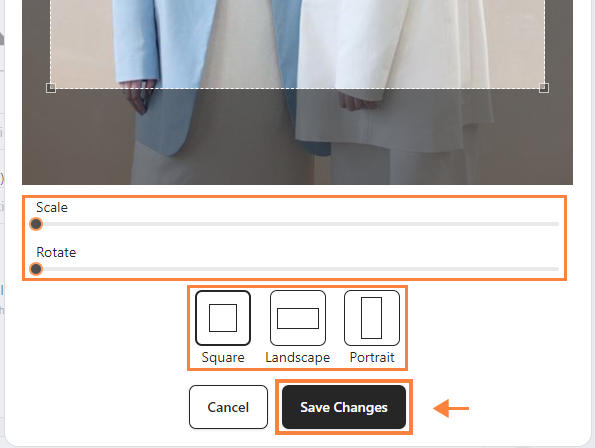
Step 3: Click “Upload Image” and adjust "Scale", "Rotate" and size then click “Save changes”

Click “Upload Image”
Adjust "Scale", "Rotate" and size then click “Save changes”

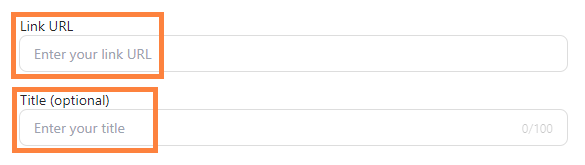
Step 4: Insert "Link URL," and add a title (optional)

Insert "Link URL," and add a title

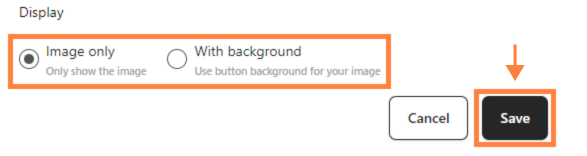
Step 5: Choose display "Image only" or "With background," and click "Save"

Choose display and click "Save"

For further assistance, reach out to us at help@bitbybit.studio

More articles

Understanding AI Agent: GPT-4o Mini vs. GPT-o3 Mini

Discover the differences between GPT-4o Mini vs. GPT-o3 Mini with bitbybit. Compare features, costs, and use cases to find the ideal AI solution for your business.

How to Enable Xendit Payment Link on bitbybit

Learn how to generate a Xendit secret key, integrate it with bitbybit, and automate payment link generation to streamline transactions.

How to Set Up Instagram OAuth

Learn how to obtain your Client ID, Client Secret, and configure Instagram OAuth for secure and smooth login experiences.

More blogs
Help & Support
WhatsApp: +62 815-1423-1000
help@bitbybit.studio
© bitbybit. All rights reserved.
PT. Benar Benar Bagus