Pricing
Login
Start Free

How to Add a Sub-Category

bitApp

Add sub-categories in bitApp to refine content organization and improve user experience. This guide walks through the process of creating sub-categories to enhance content structure in your app.

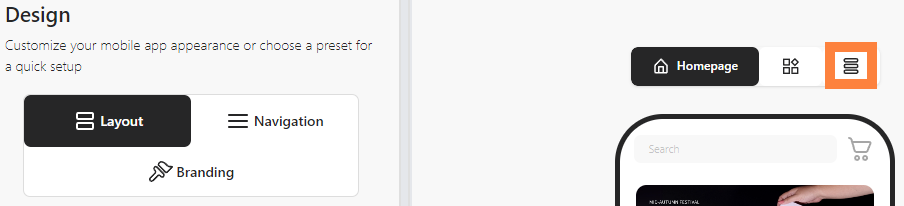
Step 1: Log in to your bitApp dashboard then click the "Navigation menu" icon.

Click the "three-line" icon

Step 2: Select desired category and click "Add sub-category".

Click "Add sub-category"

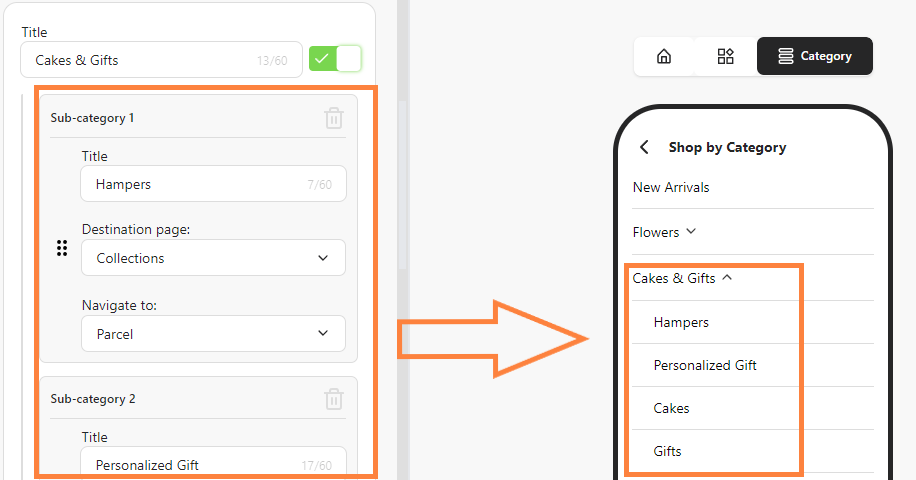
Step 3: Fill in "Title", "Destination page", and "Navigate to".

Fill in "Title", "Destination page", and "Navigate to"

Step 4: Click “Save”.

Step 5: Preview Your Navigation.

See preview

For further assistance, reach out to us at help@bitbybit.studio

More articles

How to Enable Xendit Payment Link on bitbybit

Learn how to generate a Xendit secret key, integrate it with bitbybit, and automate payment link generation to streamline transactions.

How to Set Up Instagram OAuth

Learn how to obtain your Client ID, Client Secret, and configure Instagram OAuth for secure and smooth login experiences.

How to Setup Skillset: Product Recommendation in AI Studio

Discover how to activate and customize the product recommendation skillset in AI Studio to deliver AI-powered, personalized shopping suggestions to customers.

More blogs
Help & Support
WhatsApp: +62 815-1423-1000
help@bitbybit.studio
© bitbybit. All rights reserved.
PT. Benar Benar Bagus