
Introducing Collect Data, a versatile feature designed to help you gather valuable information about your storefront visitors to improve business targeting and better customer segmentation. Gather essential data such as phone numbers, gender, birth date, addresses, and custom fields that can be tailored to your business needs. Here’s how to activate and configure this feature in a few easy steps.
Here's how we use this data:
- Tailor product recommendations: We analyze your preferences to tailor product recommendations and marketing messages to your specific interests.
- Enhanced Customer Support: Your data helps us provide efficient and personalized customer service.
- Enhance marketing campaigns: We analyze and create targeted marketing campaigns that are relevant to your interests.
Rest assured, your privacy is our top priority. We will never share your personal information with third parties without your consent. If you have any questions or concerns about how we use your data, please contact our customer support team.
Activate and Configure Collect Data
To provide customers with a better shopping experience and personalized offers, we collect additional information from customers, such as phone number, gender, date of birth, and other relevant details.
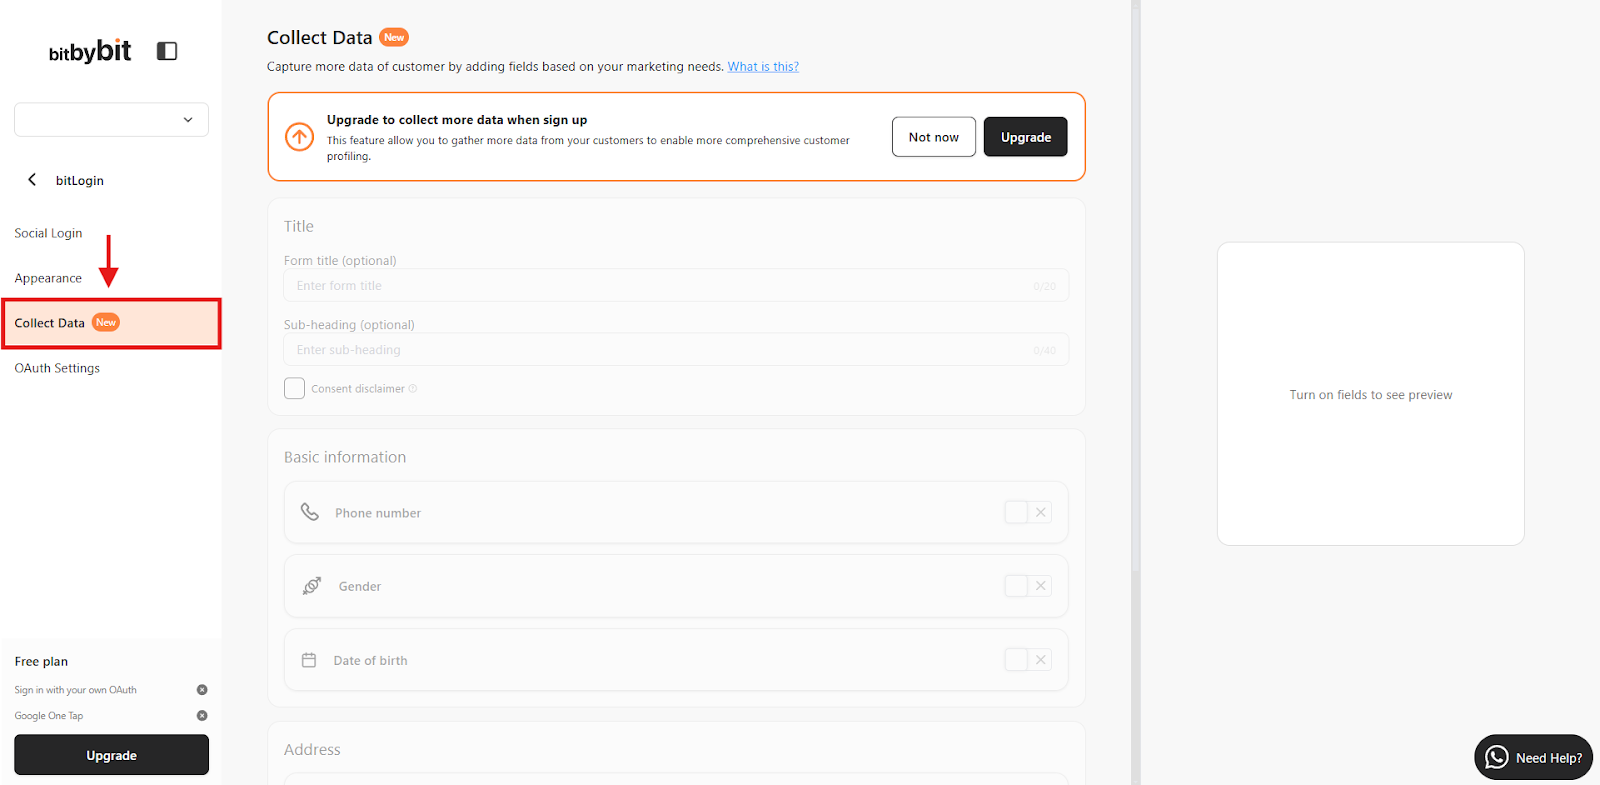
Step 1: Access Collect Data settings
- Go to "Collect Data” settings in bitLogin here.
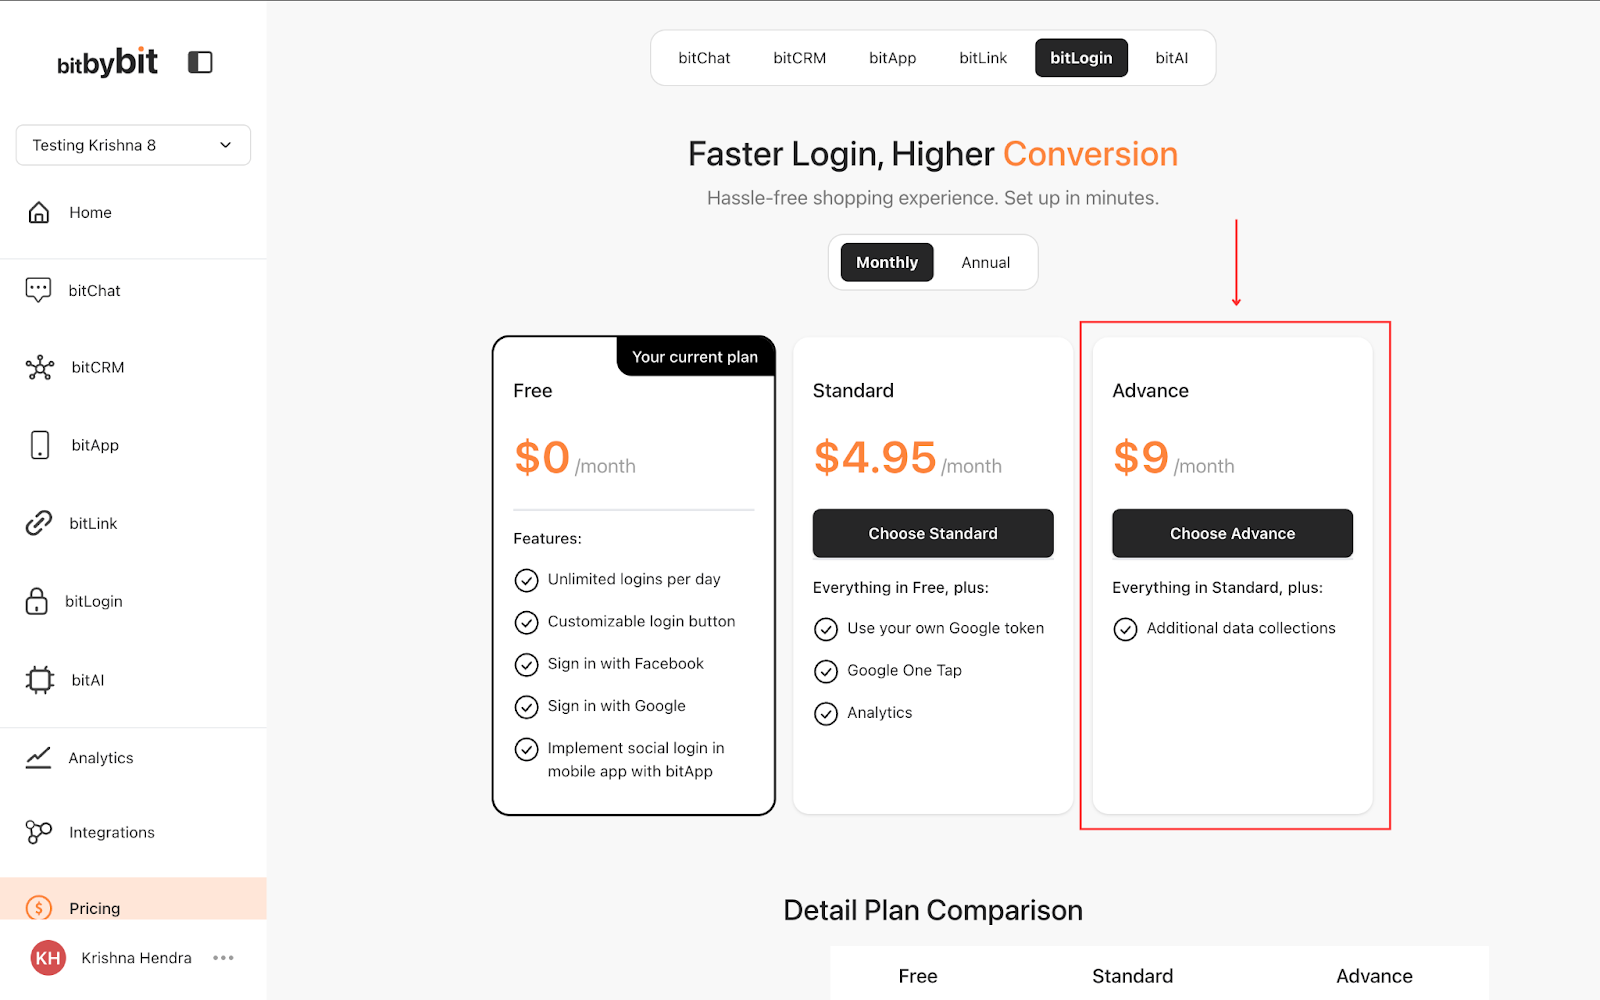
Step 2: Verify Your Plan
- Ensure you’re on the Advanced plan. If not, click "Upgrade" or visit the Pricing page.

Step 3: Activate the Feature
- If you are on the Advanced plan, the feature will be available and you can use it right away.
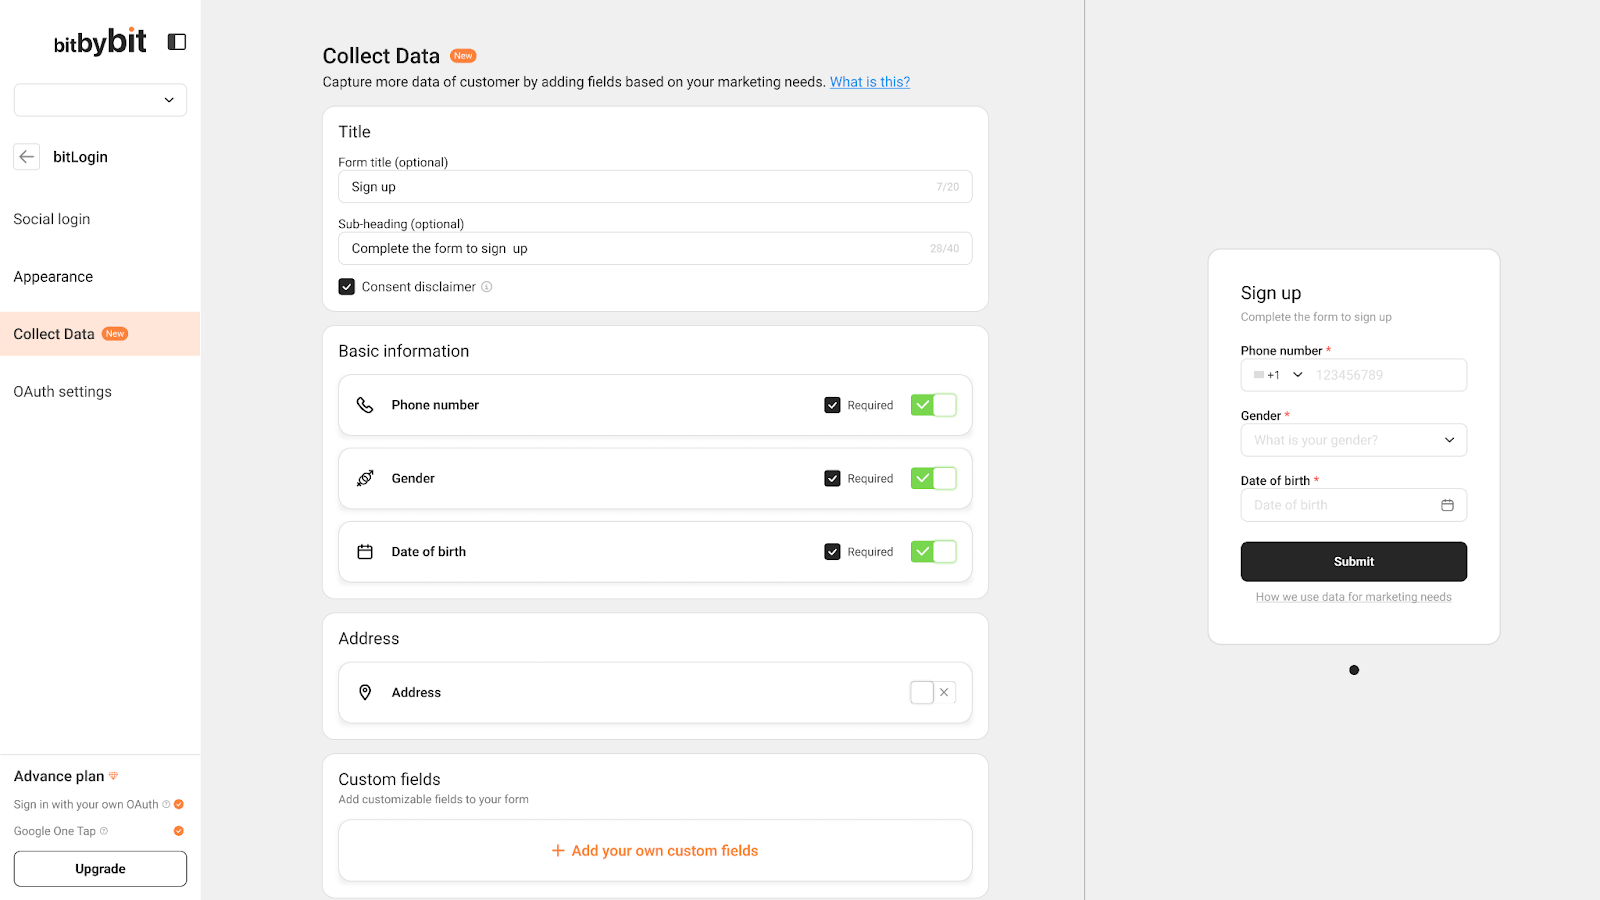
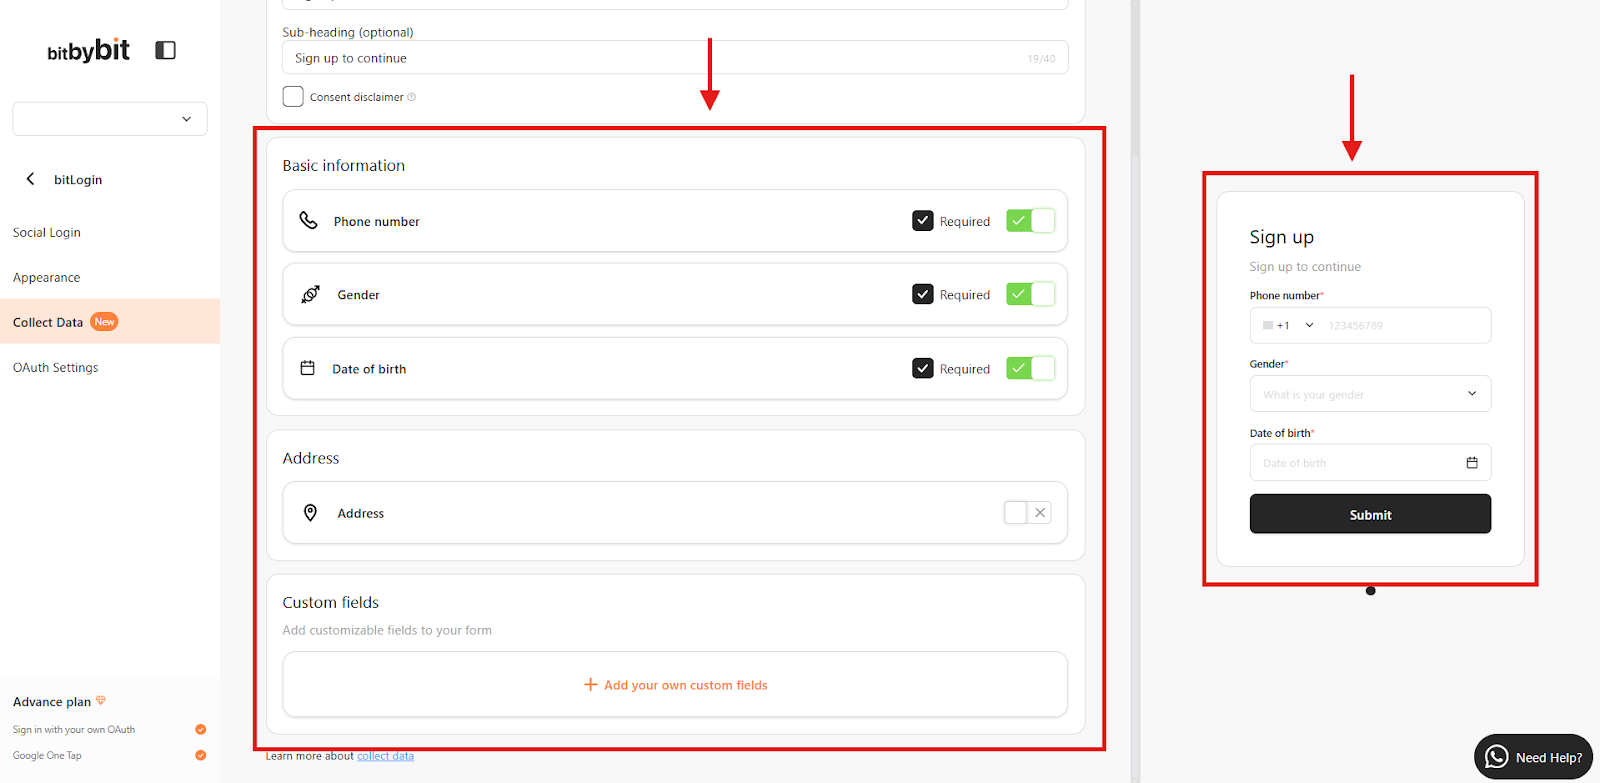
Step 4: Activate data fields
- Choose any of the fields to activate. Field will automatically be applied to the form.
- Select the “Required” checkbox to make the field mandatory.
Step 5: Customize custom data fields
- Choose custom fields options according to your business needs

- Add and customize custom fields according to your business needs.

Note: The feature will auto-apply to new customer sign-ups.
Step 6: Open Customers page to see obtained data
- To see obtained data, go to Customers page and open customer’s details

Congratulations! The Collect Data feature is now active on your store. Here’s a preview of how it appears in a screen recording.
